Mailgun
Overview
Mailgun is a cloud-based email-delivery client.
Bottle Rocket can integrate with Mailgun automatically send scans / files as email attachments to a recipient's email address.
Prerequisites
- In order to connect Bottle Rocket to Postmark, you will first need to have a Mailgun account.
- Mailgun comes with a free / trial pricing tier at 100 emails / day, however you are limited in the recipients you can send to. For the purposes of Bottle Rocket, however, you need only one sender / recipient (your own email).
Create and configure the mail server
- Once logged in to your Mailgun account, select Get Started from the left sidebar menu.

-
Follow the required steps:
- Create your account
- Activate your account (confirm with a valid email and contact number)
-
Under Send a test email from the Get started guide, select Manage API keys.

- Select Create key from the API keys list.
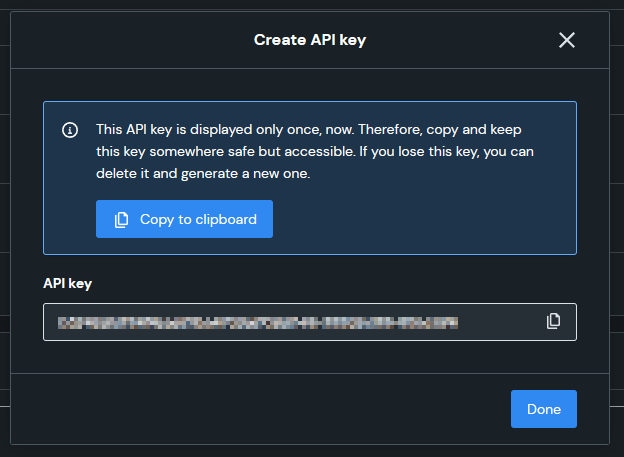
- Name the key and copy it once it appears.
-
Click Create server to create the server.
-
In the list of servers, select the newly created server.
-
Select API Tokens from the top menu.
-
Return to the Get started guide, and select Send a test email.
-
(Optionally, you can complete the steps in Set up a custom domain to configure and verify a custom domain).
-
To continue with the test domain, select View sandbox domain.
-
Under Add a test email recipient, add your recipient email (the destination email address that Bottle Rocket will send to).
-
Under Choose method, select API.
- A list of items will appear along with some code samples.
- Copy / make note of the Sandbox domain value.
- Copy / make note of the Authorized recipients value.
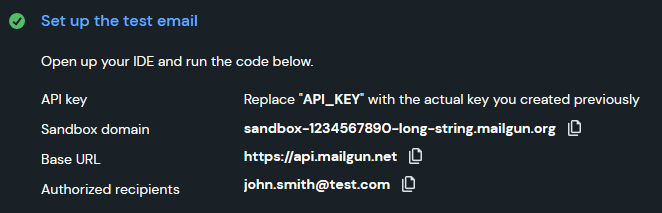
- Click to copy the server token value. You will use this token to finalize the connector.
Add the Mailgun connector
- Login to your Bottle Rocket server.
- On the left-hand sidebar, under My connectors, select Add connector.
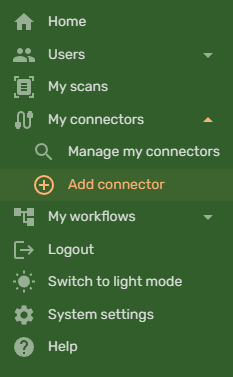
- Select the Mailgun Integration Connector from the list of connectors, and click the Add connector button.
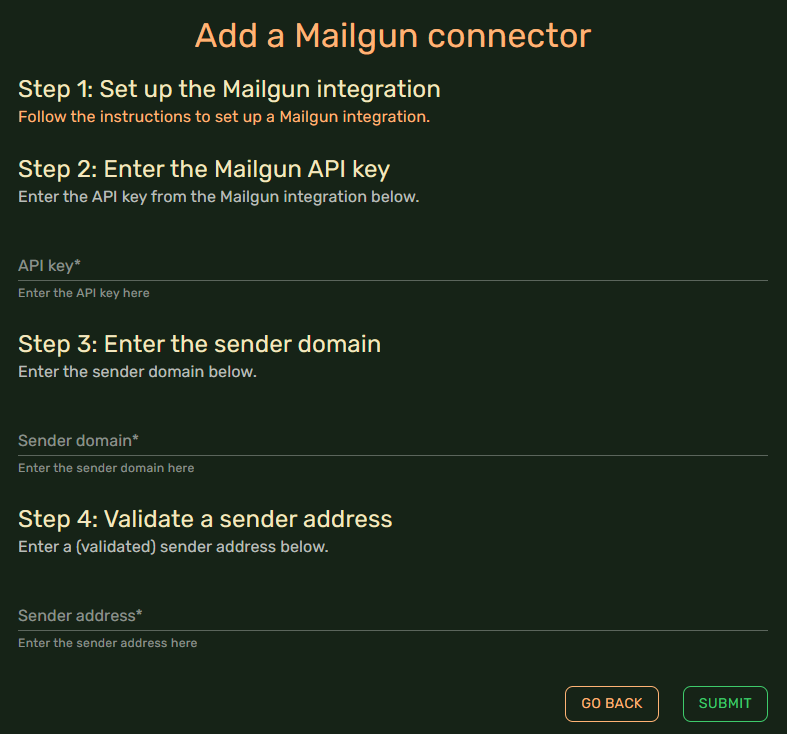
- Enter the API key, and Sender domain you obtained in the previous steps.
- Set the Sender address to the value of the Authorized recipients you obtained in the previous steps.
- Click Submit. If everything has been configured correctly, you should be redirected to the connectors list, indicating that the Dropbox connector is active.

You now have a working Mailgun connector that associated workflow steps can utilize.
Depending on the domains you have validated and the recipients you have invited, you may be limited in both the addresses you can send from, and the addresses you can send to.