Google Drive
Overview
Google Drive is a secure, cloud-based file storage and synchronization service from Google that allows users to store, access, share, and edit files from any device.
Bottle Rocket can integrate with Google Drive to upload files to a destination account that you have configured.
Prerequisites
- In order to create a "Personal" Google connector, you will first need to have a Google account.
- With a Google account, you will then need to start a Google Cloud project in the console.
- Google Drive comes with 15GB of free storage, which should be sufficient for most use cases.
Create the project in Google Cloud
tip
If you have already created a GCP project as part of a Google Cloud Vision workflow, you can use this project instead of creating a new one.
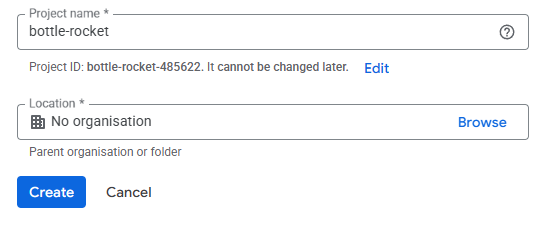
- In the Google Cloud console, select Create or select a project.
- Enter a Project name, select a Location, and click Create.
- In the main project dashboard, open the sidebar menu and navigate to APIs & services > Library.
- Search for Drive and you should see the Google Drive API listed; select it.

-
Click Enable to enable the API.
-
In the API / Service details screen, click Create credentials.
-
For the credentials type, select OAuth client ID.
-
For the Application type, select Desktop App.
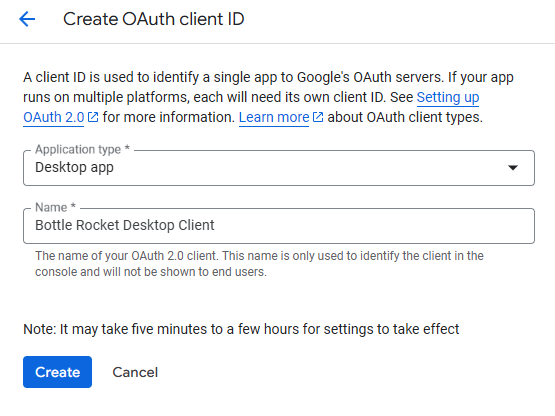
- Select Create. You should receive a popup with the OAuth client details.
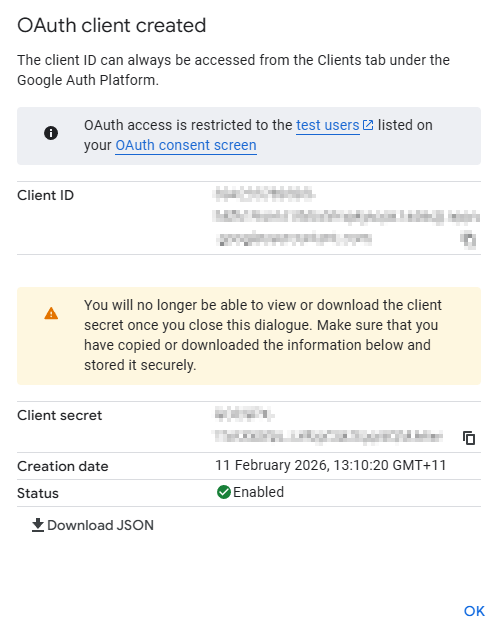
- Select Download JSON to download the credentials file. You will supply this file to Bottle Rocket.
danger
Treat this credentials file like a password - keep it secure, private, and do not share it with anyone.
Upload the private key file to the Google Bottle Rocket Connector
- Login to your Bottle Rocket server.
- On the left-hand sidebar, under My connectors, select Add connector.
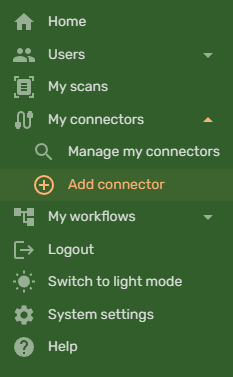
- Select the Google Connector from the list of connectors, and click the Add connector button.
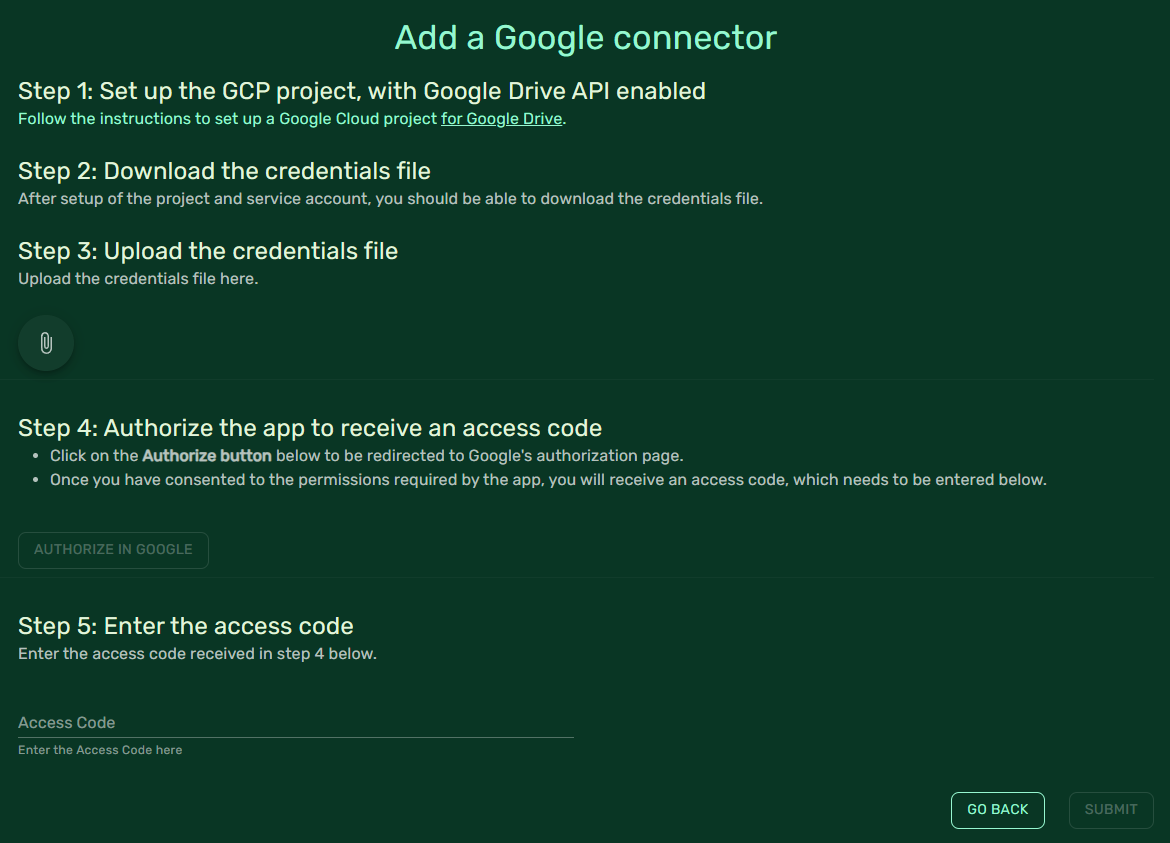
- Click on the paperclip / attachment button, and upload the private key file you downloaded from Google Cloud.
- The Authorize in Google button should now be enabled; click it to open a new browser tab.
- The new browser tab should prompt you to select a Google account to login to; select the account you wish to use with Bottle Rocket, and login.
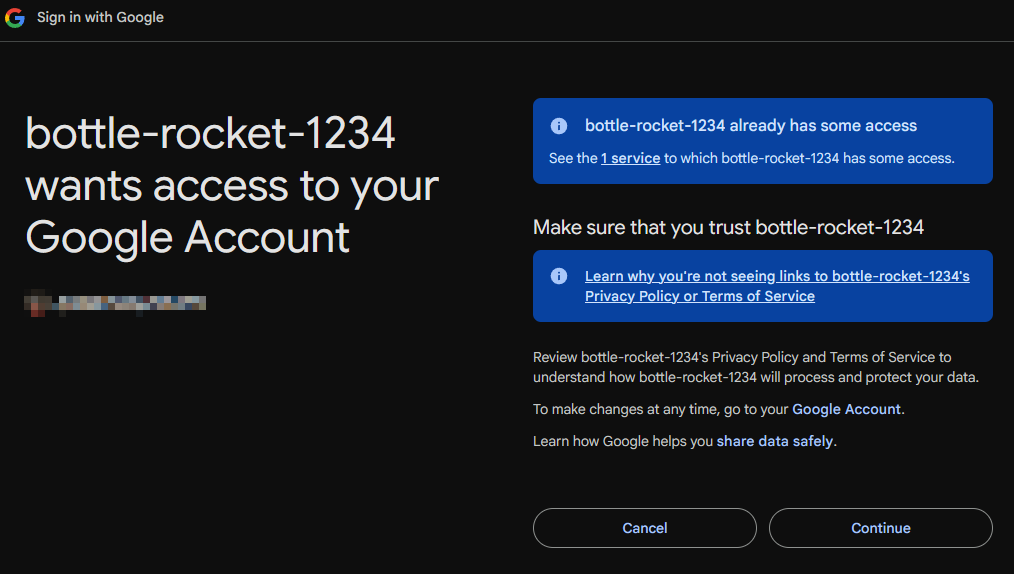
- Click Continue to proceed.
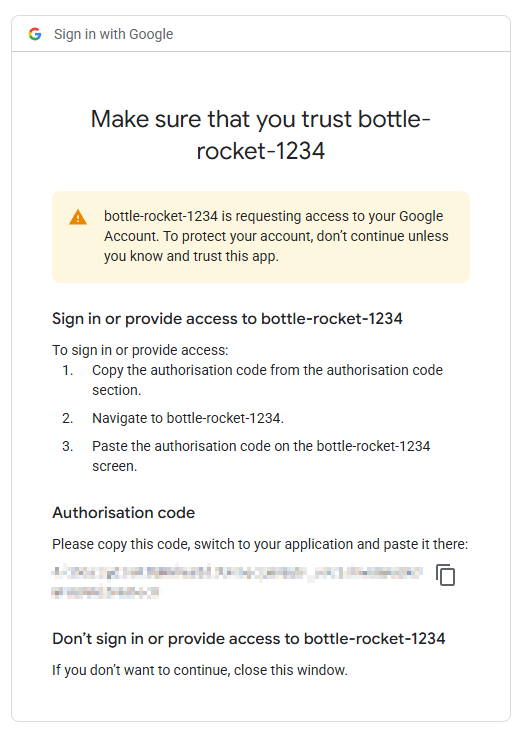
- Copy the Authorisation Code value and paste it into the Access Code field in Step 5 of the Google Connector configuration screen.
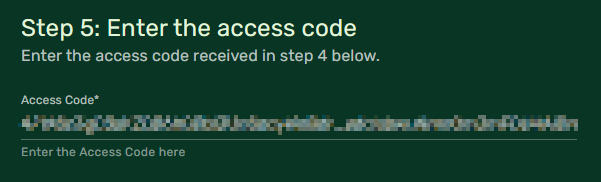
- Click Submit to complete the configuration.
- If everything was successful, the Google Connector should now be listed under My connectors with a green indicator.
